Here are some tiles from the last 2 weeks:

Inspired by Eni Oken's "Drawing Antique Lace"
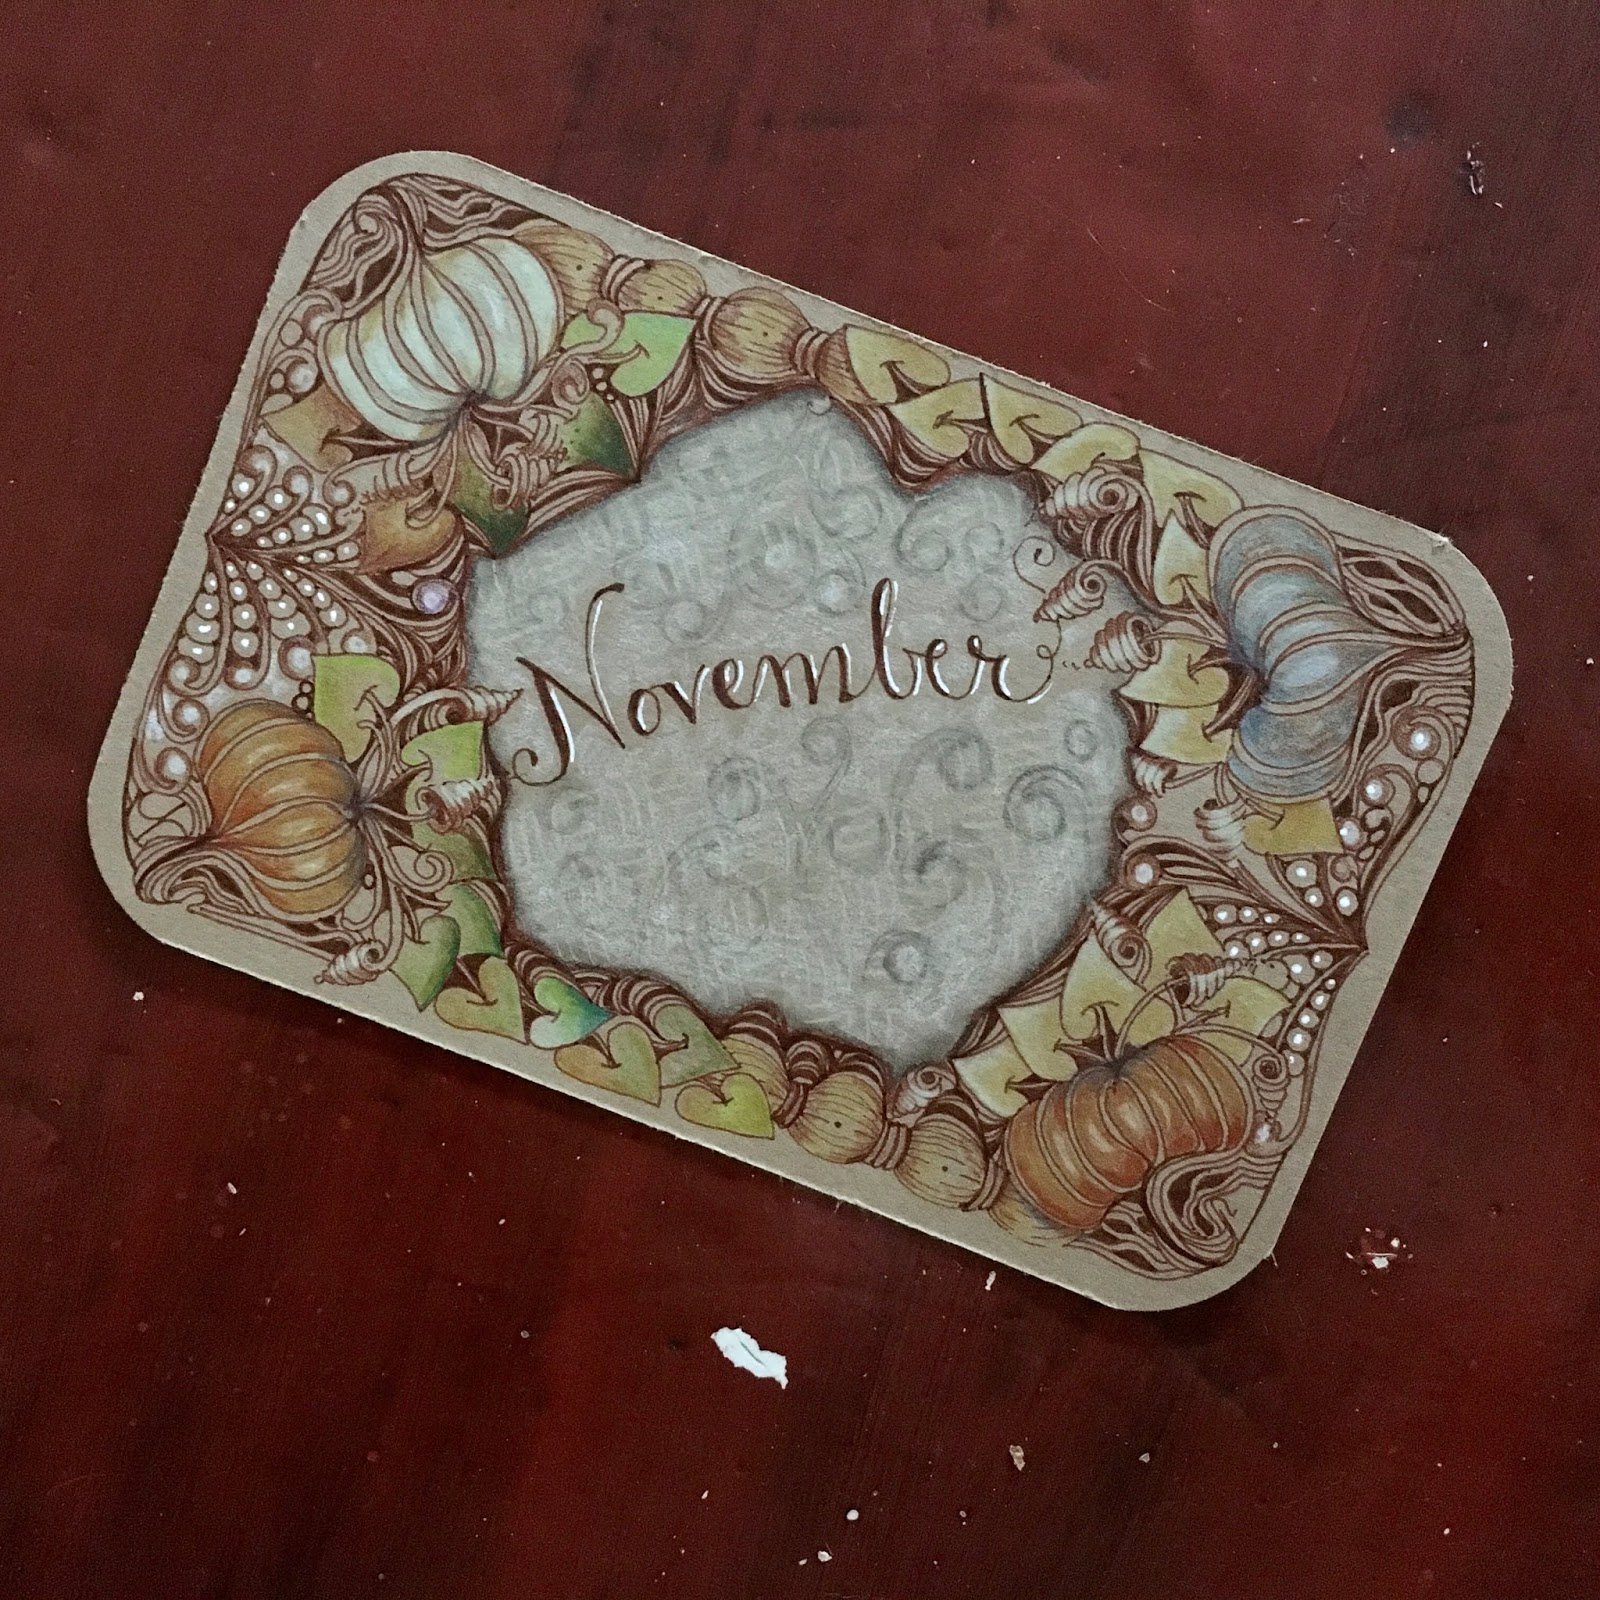
For my November postcard swap

Demo tile for my "String Theory" class

New handmade journal cover
I do like using small journals for my daily practice. Once you have hundreds of tiles, it's nice to have a tidy way of organizing them. I make journals that are the size of a Zentangle tile. Using that familiar 3.5 inch square format is so comfortable, and with a limited number of pages, the journal is easy to turn, comfortable on my hand and wrist. I thought some of you might be interested in how I make them.
First, I cut my cover. I use a thicker paper or cardboard, cut to 7 5/8 in x 3 1/2 in. (19.5 cm x 8.8 cm)
Then, I cut my paper to 7 1/4 in x 3 1/2 inches. (18.8 cm x 8.8 cm).
I decorate the cover before assembling the book, but if you're impatient to see the book, skip this step and decorate later!
I score the cover and paper where I want the fold. This just makes everything close more nicely.
Now I sew them together. I use a large needle and about 30 inches of dental floss (75 cm). Using just your needle, make 3 evenly spaced small holes in the paper and cover. (One hole in the middle, and one hole halfway between that one and each edge of the paper. Clip your pages to the cover so that they stay together while you sew. Now thread your needle, but do not knot the thread.
- Beginning with the middle hole, pass the needle and thread from the inside to the outside, leaving about 2 inches of thread inside.
- From the outside, pass the needle and thread to the inside, through one of the side holes.
- From the inside, pass the needle and thread to the outside, through the other side hole.
- From the outside, pass the needle and thread back through the center hole. Make a knot with your thread and the "tail" that you left earlier.
I have sewn these with my sewing machine. Some papers tend to tear this way, but I reenforce the journal with washi tape.
I hope this is clear. I had planned to refer you to an online article I used, but it's no longer available. Let me know if you have questions or problems.
Do you make your own journals? What's your technique?