Zentangle is...

The Zentangle® Method, created by Maria Thomas and Rick Roberts, is an easy to learn, fun and relaxing way to create beautiful images by drawing structured patterns.

Wednesday, May 29, 2024

Art JournalS

I love finding new techniques for making journals. Here's a new one. There are 8 pocket pages, of which 4 have file folder tabs. This was from a kit from Pink Monarch. I learned how to use book binding tape--so exciting! It's about the size of a deck of cards, so I can fill the pockets with Artists' Trading Cards.


I made two birthday cards this weekend.


Our local little free art gallery was getting hungry, so I made these mini collages that are also paper clips and dropped them off.


The long weekend gave me a chance to organize my desk and supplies. Ahhh.

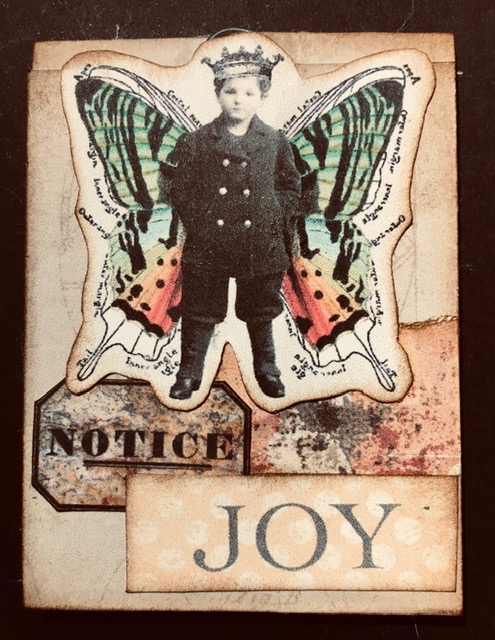
Back to work yesterday, I reached for my mini file folder journal, Madam Butterfly.


"Do it now! Today will be yesterday tomorrow."

This angry Madam Butterfly makes me laugh.
I remember when I used to listen to opera on my commute
home from work. Whatever challenges I had faced during the day
paled when I listened to the melodrama! And the characters were
singing about it!!! Sometimes I would try to sing about the "melodrama" in my life. 
That really made me laugh!


Thursday, May 23, 2024

Mini File Folder Art Journal

In my junk journaling journey, I've discovered mini file folders. Think file folder for 3 x 5 index cards. After watching some tutorials this week, I embarked on making them into a new art journal. They allow me to pursue the junk journal techniques I'm learning--making pockets, "belly bands", tucks, tags, tabs, collages, etc.--and to use my own art rather than the pre-made kits. This journal began with some printed mini file folders from The Graphics Fairy. The theme is Madam Butterfly. There are 5 folders, so 20 pages.  (I love the feel of this journal in my hands. It has a high holdability score!)

NB: Some people wonder what you do with these little journals. I wonder, too, sometimes. I have different handmade journals from years past. They sit together in a cubby of my dad's--now my writing desk. Sometimes I take them out and enjoy seeing what I've done. I don't have a lot of wall space, and don't like a lot of clutter. These little journals feel manageable and organized.

Here are the first 5 pages. 


2 pockets with one collage card in the larger one.


A collage pocket with a journal page tucked inside


A collage pocket with a collage and Zentangle card inside


My art work before the collage and distressing


Zentangle and collage card that flips open


Zentangle background


Collage card and belly band


One last picture of some 3D mini folders I made this week to stash some collage elements on my desk. They fit nicely into a repurposed decorated cracker box.


Happy and joyful creating!

Wednesday, May 15, 2024

A mixed bag

A little mixed media, a bit of Zentangle, a touch of origami.

Here's what happened:


"For absent mothers. For absent children."


The cover of my "Sistars" photo book, from CZT AE2023.
This lesson was by Lisa Hoesing, CZT.


A photo page from the "Sistars" photo album.


The squares behind the envelopes are a 1-inch grid. These are for collage pieces. Or tiny letters!


Wednesday, May 8, 2024

Fits and Starts

Monday was Art Day! A day of play, exploring, learning, trying and failing and trying again! I like to have a day every week for this, but it doesn't often happen. Honestly, I get caught up in producing something I can use here, even it's not something I love. Monday I spent several hours messing around. I wanted to try the embossing ink as a resist. I came to the conclusion that I am resistant to resists! (Embossing ink on paper is supposed to resist any water based color.) Sigh. I had several 3 x 4 inch pieces of heavy cardstock, so I decided to just keep trying different techniques. I drew, stenciled and stamped with the stuff, with disappointing results. But my goal was to try new things, so I succeeded! Here's one piece I managed to use for a collage:


Here's another, in a larger format. The embossing doesn't really show.


4x6 inches

This piece was inspired by a Mother's Day card tutorial on The Graphics Fairy.


Friday, May 3, 2024

When you need to rest

This week has been teaching me to rest and listen to my body, so I don't have a lot to show. 

"Ankh: The Key of Life", a CZT AE lesson by Rashmi Agarwal, CZT, had me drawing on vellum again. I created a papyrus-like texture on the "back" of the tile and added the ankh symbol on the front.


Gelly rolls and pastel pencils on the back


Microns on the front


Can you see the additional blue I added on the back?
It represents the Nile. The egg represents birth/life and the arms represent
the earth, with papyrus and the blue lotus flower.

I recently purchased some lovely papers from Pink Monarch Prints. They inspired this mixed media art journal page, which had my head spinning. I lost my sense of up and down! When I caught my upside down text, I covered it with an arrow pattern called Schway (as in "which way?"). I had to put it aside before I could finish it. I like the text on top.


Everytime I looked at, I heard Maria saying, "There's no
up or down in Zentangle!" Grateful for this tenet of the Zentangle Method!


Thursday, April 25, 2024

Art Journal: 3D!

If you've been following the blog for a while, you have heard me mention CZT (Certified Zentangle Teacher) AE (Artifex Editio, or Master Class) 2023. This online class from 7F5R Studio in Singapore includes 27 classes from CZTs all over the world. Once purchased, it is available for 1 year. My year is about 2/3 up! So I've been working to move along through the curriculum, since I would hate to lose any of its great opportunities. 

This week, both classes involved 3D projects. The first, "12 Faces",  by Nina Dreher-Goddertz, resulted in a dodecahedron, from a single sheet of cardstock. (I used a lovely textured pink digital collage sheet,)


Step 1: Print the template. Cut, fold and crease.


Step 2: Draw. I used a Micron 05 in "brown", which is more of a maroon. I inked the edges with distress ink.


Step 3: Shade and highlight. I added color with a pastel pencil.
Step 4: Fold and glue. (No picture, since I had glue all over my fingers!)


Step 5: Appreciate!

My second project was "Graceful Grays", by Tomomi Galeano. I decided to go rogue a little on this one. The Kousa dogwood in my garden is in full bloom. This tree reminds me of Connecticut, where it grows profusely. They are not very common here in North Carolina, where the common dogwood with rounded petals grows wild, so I have spent some time every day admiring it. It became the inspiration for the floral "bouquet" in the center of my tile.


Step 1: Draw the centerpiece, using black and gray pens.


Steps 3 and 4: Tangle the border. Shade.


Step 5: Create a 3D blossom on vellum. Step 6: Cut it out and soak it in water for 1-2 minutes to make it curl up.


Step Seven: Apply it to the tile.

Definitely different this week!
Thanks for stopping by, and thanks to Nina Dreher-Goddertz and Tomomi Galeano for these wonderful classes!


Wednesday, April 17, 2024

Art Journal: Embrace the Flaws

The Zentangle Method focuses on trusting the process. There is rarely any planning, other than giving a random line, or string, to break up our paper into smaller spaces. This freedom helps us be more meditative, more mindful as we fill up space, one stroke at a time. And the mindfulness frees us to follow unexpected leads that pop up.

I want to show you how today's piece evolved. I set out to follow the Zentangle Method, and put down my string in pencil. I laid out a rectangle, a circle and part of an oval. I used a compass and an oval cutter for this part, which we don't encourage in Zentangle classes. As I was trying to make an oval, I accidentally scored/cut the paper and the collaged photo I put down first. Great start. No mistakes. I went ahead and tangled around the photo.


Day 1, tears and all

When I came back to the piece the next day, I considered starting over on a new sheet. No mistakes. I decided to keep working. I added some more paper and tangled the "frame".


Day 2

This morning, I continued to have serious doubts! No mistakes. I tangled in some of the white space with my gray Micron. It looked so cold and ugly! I knew I wanted color, but something more than a colored pen. I picked up my glass dip pen, which I've never tangled with. I mixed up some Lindy's Magicals pigments and started tangling with the dip pen. This was fun. (I know it sounds weird, but I could almost hear the piece encouraging me. I was the baby learning to walk, and it was the parent, arms outstretched, standing just close enough to not let me fall.) I was drawing with glass! I filled in all the spaces, one stroke at a time. I still didn't like it. The Zentangle Method step 6: Shade! The graphite was not making me like it any better. I picked up my trusty dauber, and added some distress ink. Ahh, now it was warmer. (I was warming up to it?) I applied more ink, and even started bringing it onto the tangled lines. UH OH. By rubbing the foam dauber over the paper, I had roughed up the scored/cut part. At this point, I decided to just go for broke. I folded the scored line and inked it. Then I made more folds and inked them. To further highlight the tears, I varnished the oval area with clear nail polish.


Finally, I liked it! But the circle looked empty and needed some text. "Embrace the flaws."