Zentangle is...

The Zentangle® Method, created by Maria Thomas and Rick Roberts, is an easy to learn, fun and relaxing way to create beautiful images by drawing structured patterns.
Showing posts with label 12 Days of Zentangle. Show all posts

Sunday, November 13, 2022

I'm so excited!

Christmas came early this week! New techniques! New tangles! New explorations!

Zentangle HQ released 7 new tangles--and zen some!-- to celebrate the ZenAgain 2022 reunion for CZTs. Once the step-outs come out--probably in the Project Pack 19/12 Days of Zentangle release in a few weeks--everyone can enjoy them together! I'm still "unpacking" them, but will share some in a future blog post.

I took Eni Oken's "Eco-dyed Tangling" class online. (You can purchase it in her shop.) This was a totally new and exciting and messy experience, aka fun! The class addresses using eco-dyed papers, which have been prepared and dyed with flowers and leaves. However, Eni also teaches us how to make faux eco-dyed papers with distress inks and watercolors. Warning: I'm hooked! If you've followed my work for a while, you know how colored backgrounds are my favorites to work with--distress inks, watercolors, pigments. These faux eco-dyed papers go there, and beyond, as they use my other favorite element, leaves. Who could ask for more? Here are some pictures of my playtime:

Supplies. Notice paper towels, wipes, and hair dryer!


My first press with leaves and distress ink


The tan tiles on the right are the first press with leaves and distress inks.
The remaining tiles have some watercolor added.

The completed "eco-dye" effect

The next step almost lost me. Eni's tiles looked so different from mine. She started tangling. I thought, "This just doesn't work with what mine look like!" I tried to follow along, but decided to go with what felt right. I wanted the leaf shapes to stand out. Here's what happened:


My favorite. By now, I was gaining confidence.

This lesson put me in a beginner mode. Every morning, I try to remind myself of a favorite Meister Eckhart quote: "Be willing to be a beginner every single morning." Being a beginner can be messy and uncomfortable. My inner critic shook her head and muttered, "You should have watched the whole video before you started!" (Smacks her teeth!) But, if I had, I might not have discovered what was in ME. And I think that's what this art thing is all about.

Finally, I close with my finished Zenbirds for Ukraine piece, taken from a lesson by Lynn Mead.


Wishing you happy beginnings.


Sunday, December 19, 2021

Look, Ma! No drawing!

Have you seen the Zentangle 12 Days of Christmas videos? We're up to day 8, and the projects all involve creating dimension in one's tile to make it 3D! Not just through extreme shading and highlighting, but dry embossing, folding and more!

I haven't been able to follow along as faithfully as I usually would, and that's okay. But I did want to share a few of my creations, and hope that they, in turn, might inspire you.

First, a dry embossed card for my sweetie. (This was day 3 of the 12 Days of Zentangle.) I followed the basic idea, and then added some color. The texture that you see was created with an embossing tool, by "carving" the design into the paper. I would love to do more of these. If you don't have the tool, you can use a ball point pen that is out of ink, or a mechanical pencil with no lead.


We have a new Christmas tree that is quite a bit smaller than what we usually have. I needed some more decorations, so I decided to make a garland with folded tiles. (I had seen this years ago on the Zentangle blog.) I used some distress ink and pigment dyed papers for most of the 2-inch tiles. I made a template with Flux on a regular sheet of copy paper so I didn't need to draw the individual patterned tiles. I
cut them out, and folded all these 2-inch squares. (Parallel folds spaced 1/2 inch apart.) Then I glued two sides to make the triangular prism shape. Tips: I used a scoring tool before folding, and double-sided tape to assemble them. I strung them together on some 1/8 inch satin ribbon that I had. I think it would be interesting to put them on a wider ribbon, too.


My other project was an ornament that Rick made on day 8, using 4 Bijou tiles. I chose to use more dyed paper for these.


Even though I haven't been able to draw along with the ZT crew, I have enjoyed finding inspiration to create decorations for our little tree.

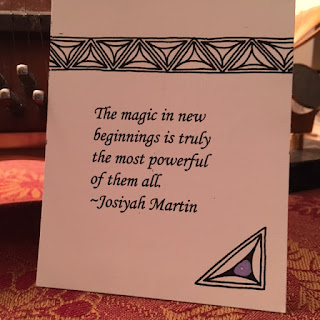
My New Year's cards for Meals on Wheels featured a quote about new beginnings.


May you find magic in every new beginning!